ltwguns.com

Actions Speak Louder Than Words
It is currently Sun Feb 15, 2026 10:15 am

All times are UTC-08:00


Post new topic  Reply to topic  [ 10 posts ] 
Author Message
PostPosted: Thu Jul 10, 2014 8:12 pm 
Offline
Board Member
Board Member

Joined: Fri Feb 20, 2004 5:30 pm
Posts: 4422
Location: MI
So as not to resurrect this really old thread--
viewtopic.php?f=6&t=6474
-I am starting a new one.

Some work I did for a very good friend and his wife, going back to 1988. Two “pin” guns. The chromed one is from ’88, the blued one a couple years later. Both have sent many a bowling pin to their reward. Felipe was/is a great pin shooter, we shot together at Second Chance for many years. We would go to local matches in Northern IN where he was the police to help warm up. Usually one or the other of us cleaned up and then the other cleaned up what was left.

Felipe was my first real “friend who was the police”. I was already pretty sure, but Felipe really proved it to me, that police are a lot like regular people. When I saw how he behaved off duty, treated people with decency and respect, always giving the benefit of the doubt (but always ready to be proven wrong), I was impressed. We first met at Second Chance probably about 1984 and are great friends to this day. Besides still being a great shooter he is a Category 5 Grill Master. Taught me a lot about good food, he did..... rare is the day when words like "cilantro" and "chorizo" are not spoken in my kitchen. When he's back in the area I get invited to family events, a big honor for me.

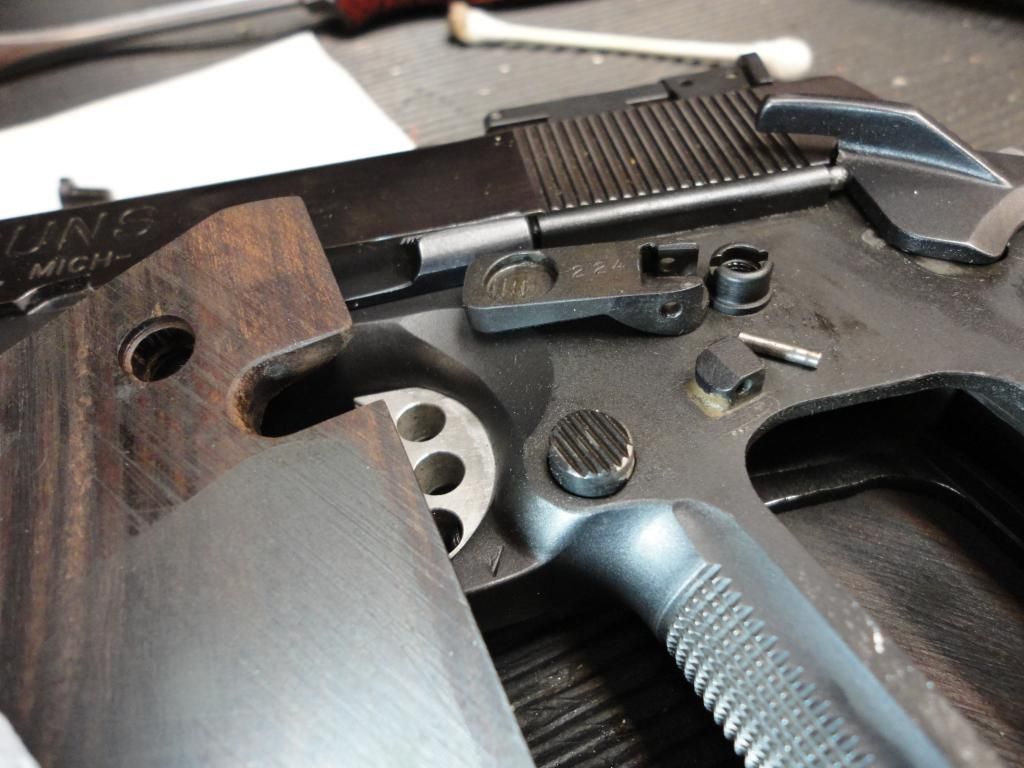
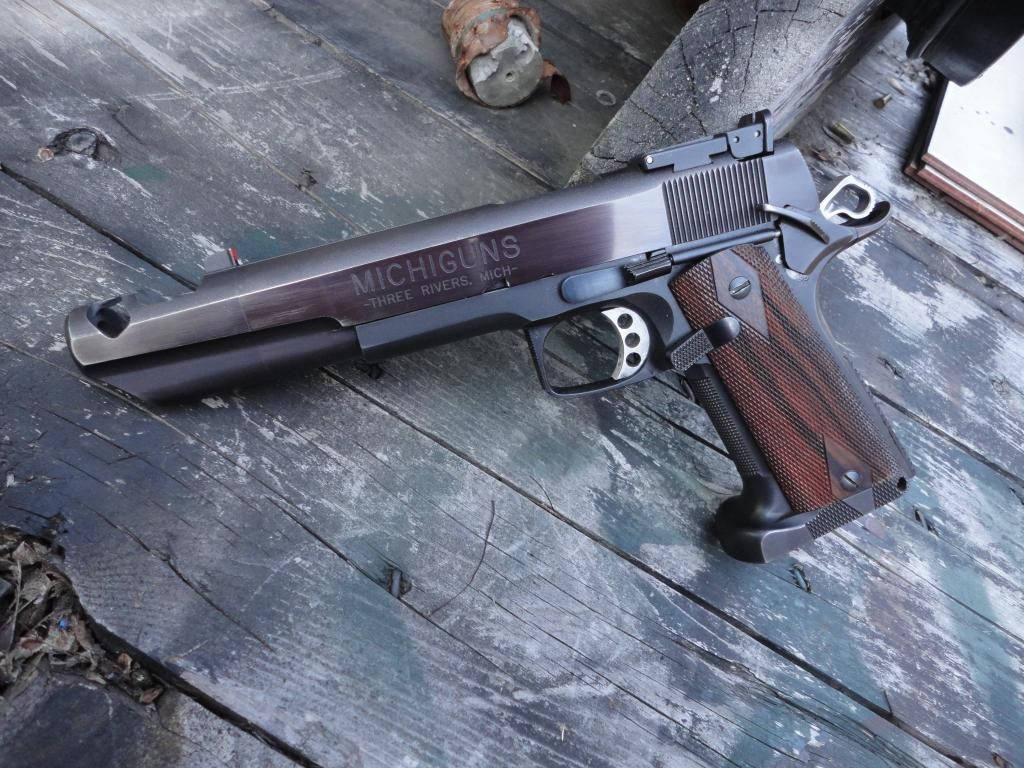
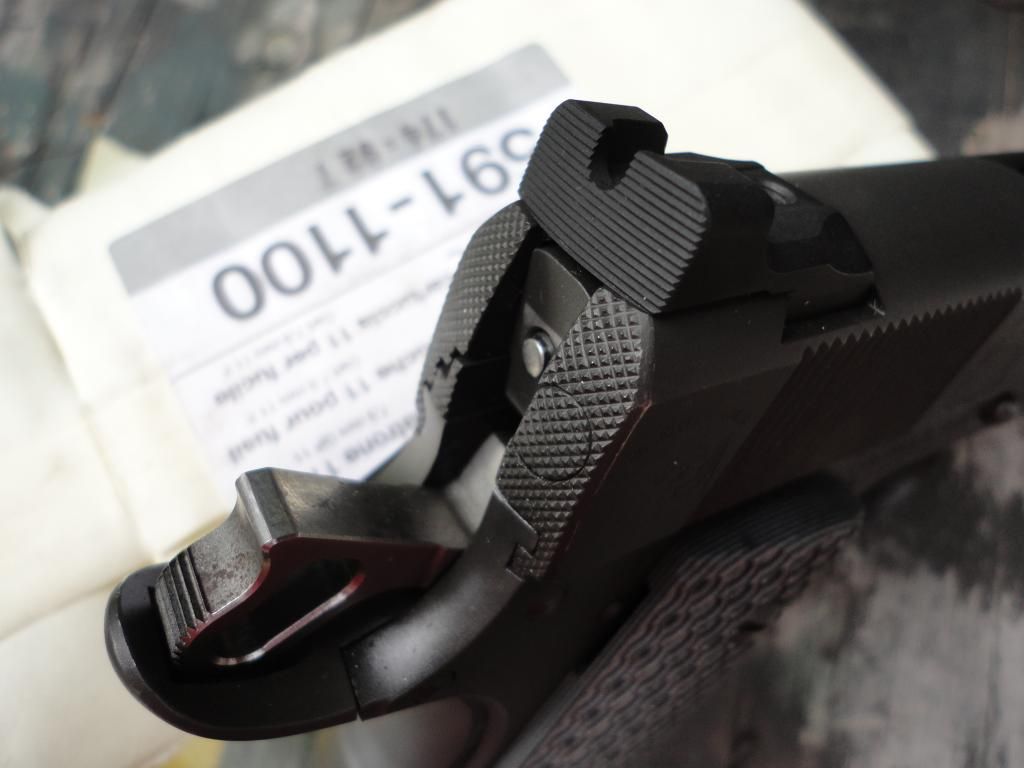
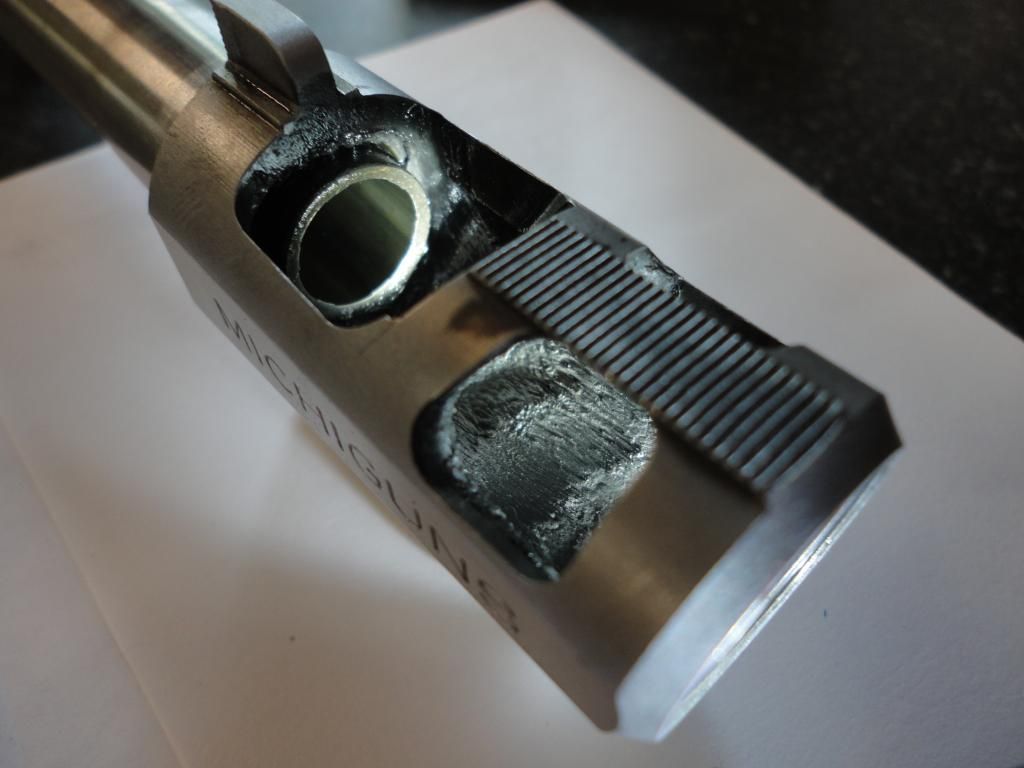
Both comps are pretty much the same. Threaded-in second blast baffle. This is a manufacturing expedient, a cleaning expedient, and a styling thing. Each gun done this way came with the little spanner. The threaded-in baffle bottoms out and shoulders off, sealing the threads from getting hopelessly packed with lead and crud. The recoil spring plunger, made from a grade-8 bolt, extends forward of the slide, telescoping into the comp. Longer springs are happier, longer-living springs. The front sight is integral to the compensator body, that is, part of the same chunk of steel. Won't be falling off or coming loose until sent to the smelter. Hope that never happens.
Image

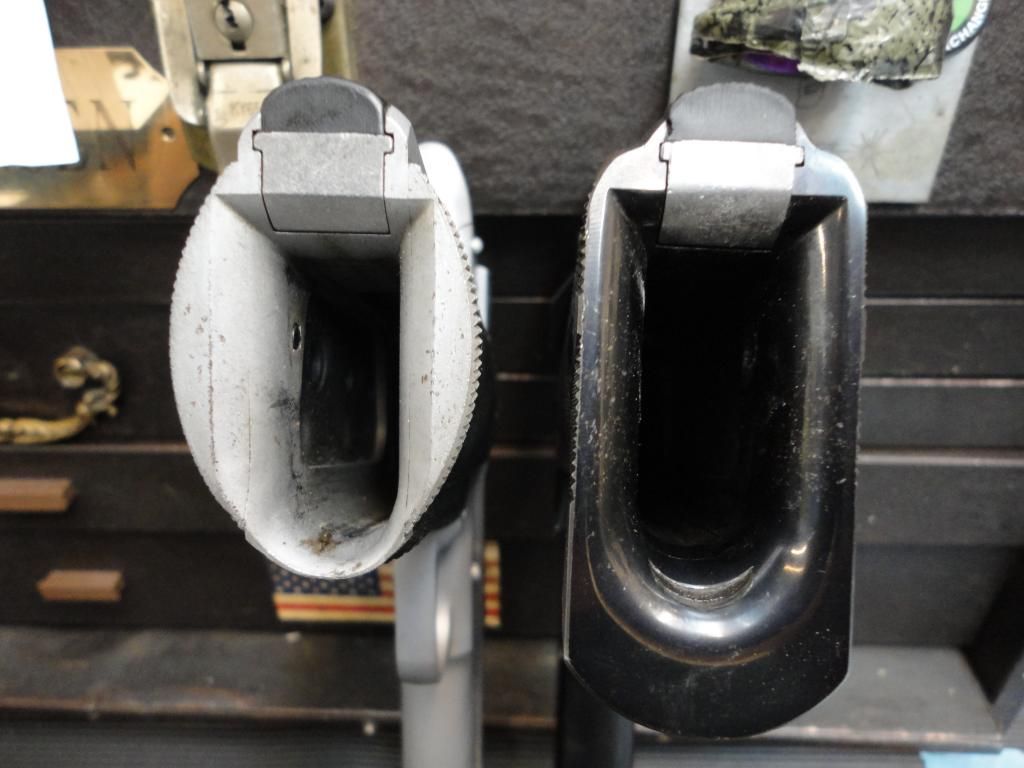
The first baffle is a piece of 3/32 flat ground stock set into a slot EDM’d in place. It is then silver-brazed. You can see here where the chrome did not “like” the silver. Never figured out why that was, that chrome and silver usually do not get along. I mean c'mon guys, you're both metals, you're both on the Table of Elements, you're both shiny and expensive..... you guys are the rock stars of the metal worl........ wait a minute, rock stars? Not getting along? OK, now I think I see what's going on here.
Image

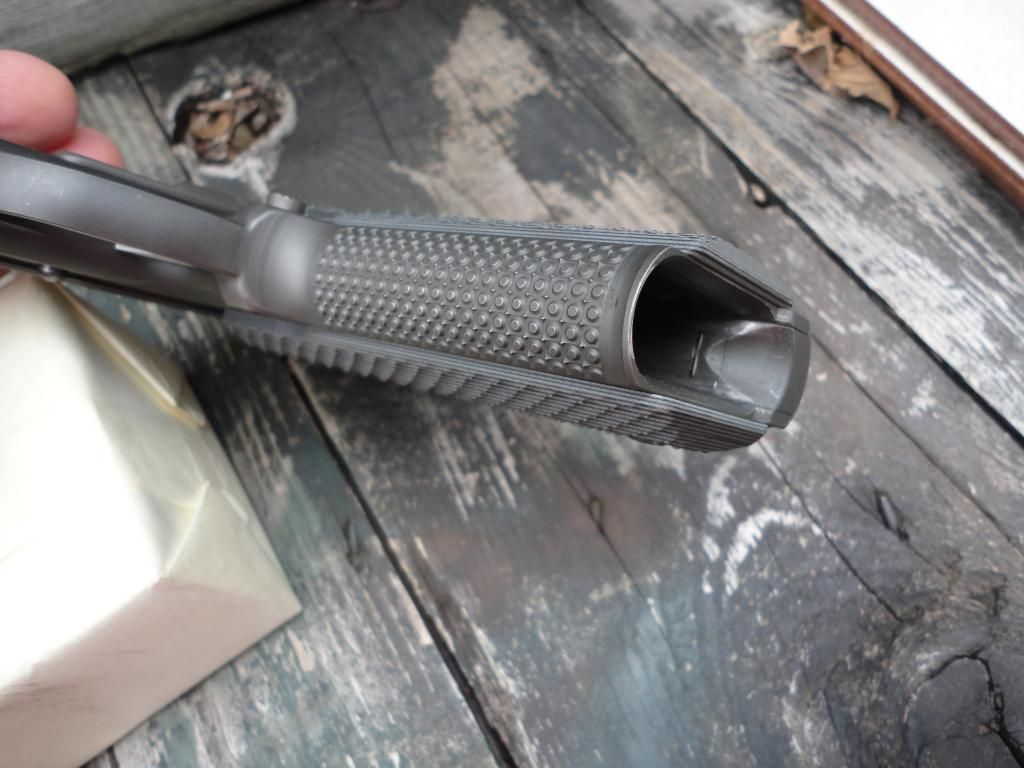
All the things Felipe does well…. He is, how shall I say it, how to put a positive spin on it….? How about: Good news! He does not suffer from OCD when it comes to maintaining guns! I will chisel the lead out of this comp, literally-- before I return it to him. I make a chisel out of mild steel and put it in a vibrating engraving tool-- and mini-jack-hammer the lead out. Sounds crude but it works and as the Gunsmith's Hipocratic Oath sez, it does no harm.
Image

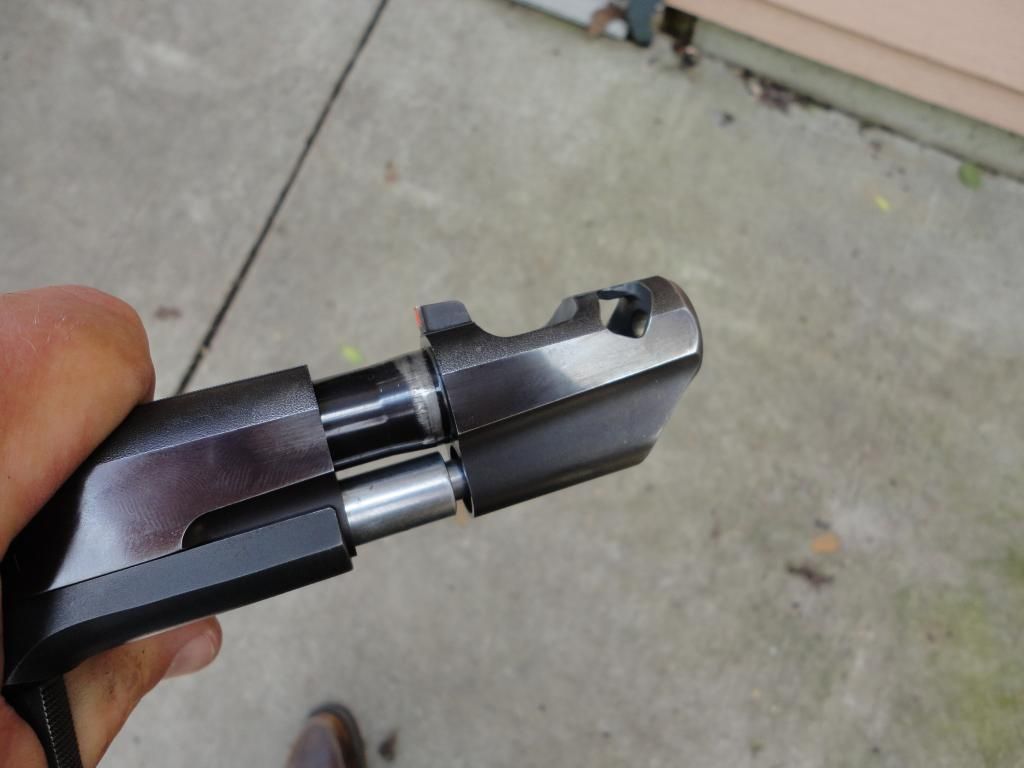
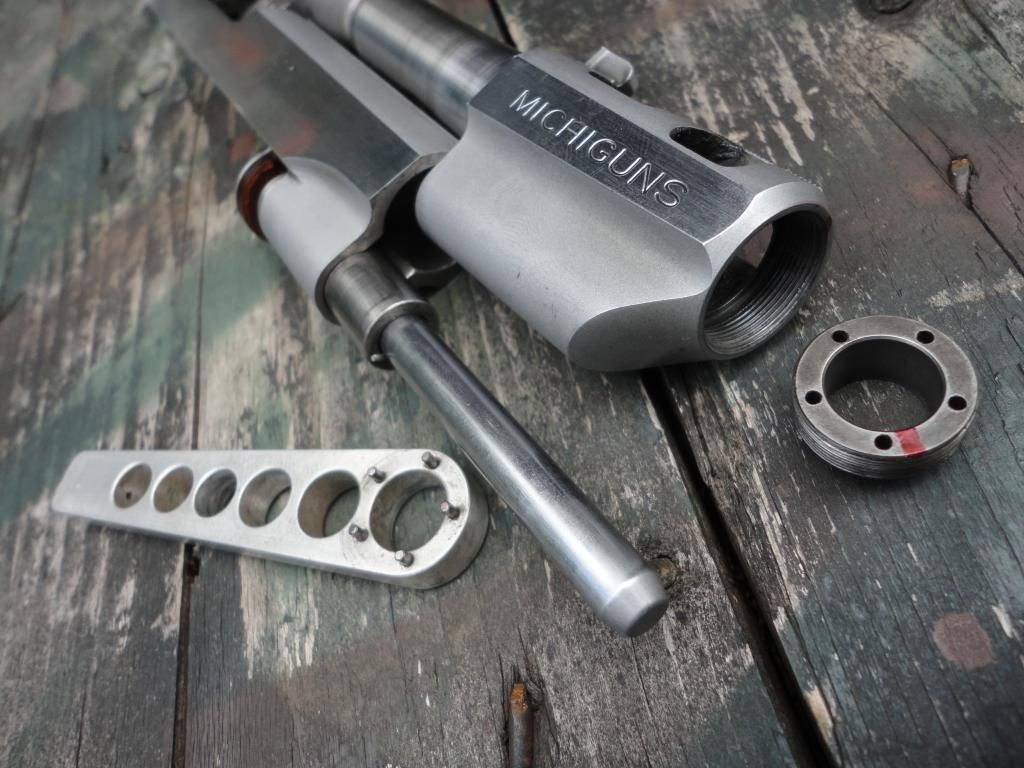
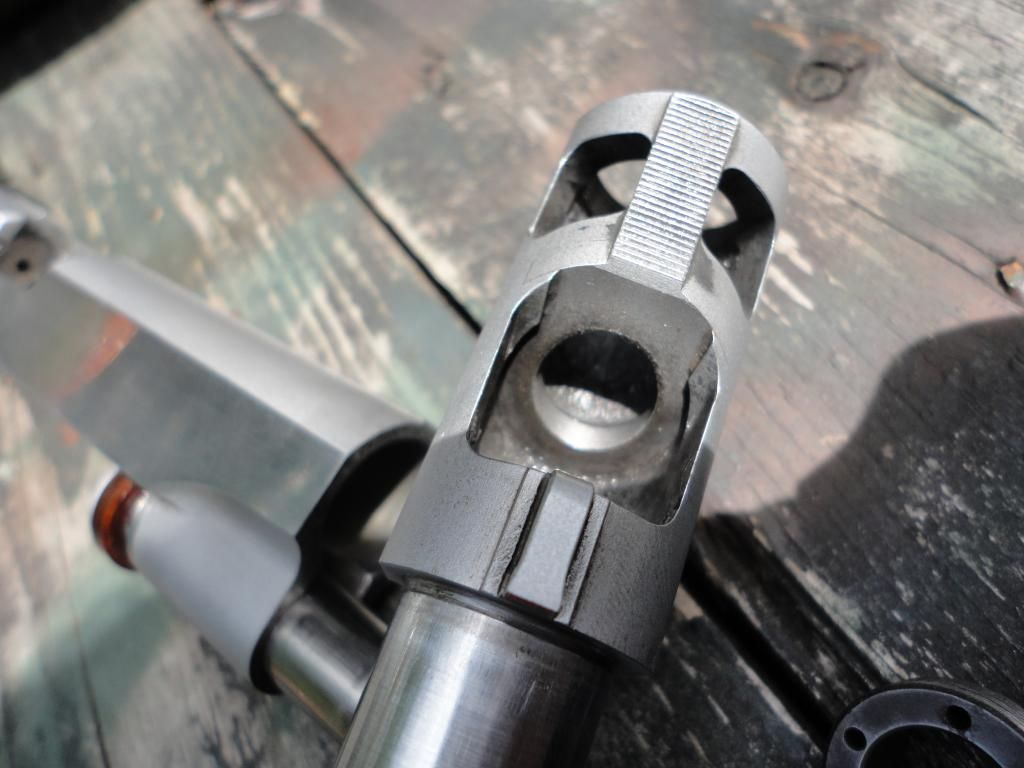
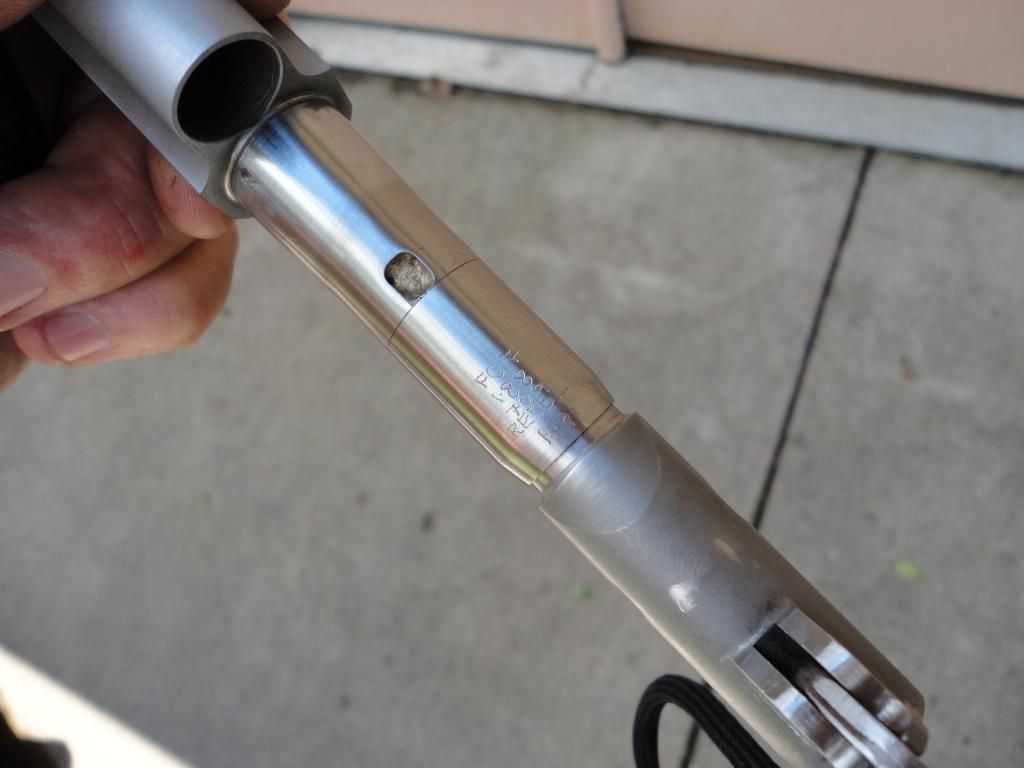
He called me one day a couple years after I built this for him and was sick about having bulged the barrel. I rebarreled it for him. These comps were made from a 2” diameter bar of 4140 starting about 7” long, so the gooseneck was integral to the compensator. In the rebarrel I had to cut the gooseneck off a bit as it had bulged with the barrel. What you see here is the repair, and as was/is my habit with this kind of thing I don’t rely on any kind of wundercompound to hold things together. It’s gotta be steel on steel or silver braze. Comps were threaded on and a good silver joint said “never, ever coming loose”.
Image
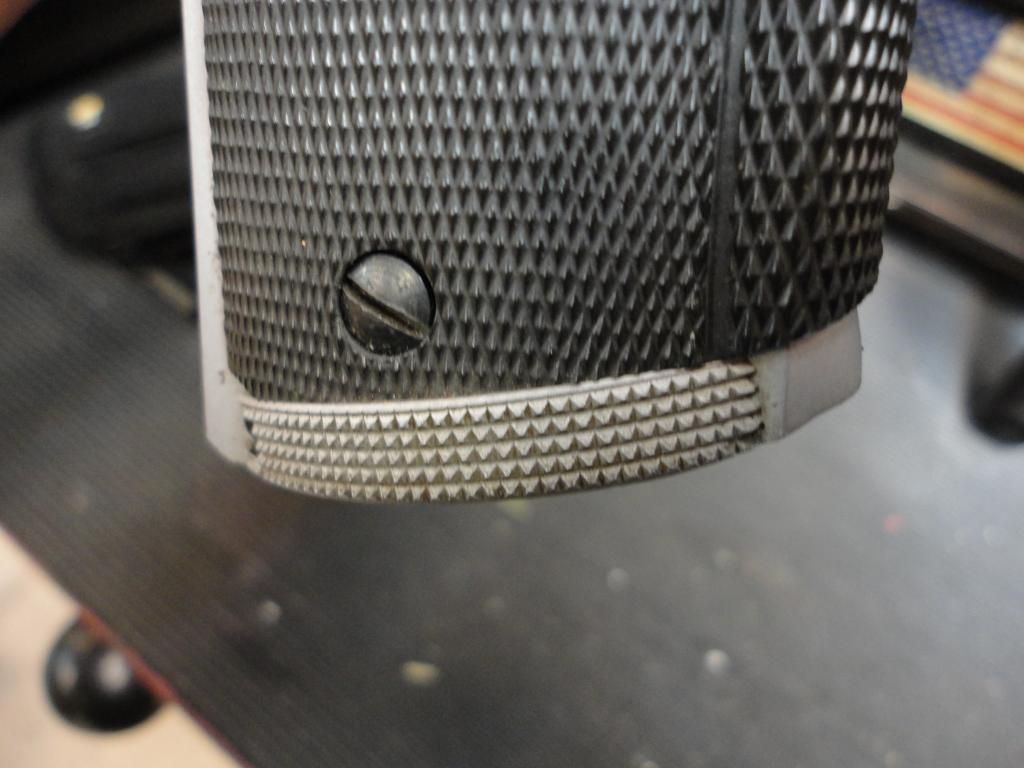
Here’s what the mag release looks like. A pivoting lever working off a little stud pocketed into the frame and sliver-brazed in place. The cut in the grip panel keeps the pivot pin in place. It does not give a leverage advantage, it just gives more button area. Serrations on the button (not visible here) are very early Conamyds…. cut with a cutter I made and not EDM’d into place.
Image


Top
   
PostPosted: Thu Jul 10, 2014 9:40 pm 
Offline
Senior Member

Joined: Tue Mar 13, 2007 12:34 am
Posts: 290
Location: CA
Very cool Mr. Christiansen; thanks for sharing....


Top
   
PostPosted: Fri Jul 11, 2014 7:16 am 
Offline
Board Member
Board Member

Joined: Fri Feb 20, 2004 5:30 pm
Posts: 4422
Location: MI
Some more--

Squared and checkered trigger guard and mag release. Some are thick enough where you can just heat it up red and reform it—this was one.
Image
Witchita rear sight mounted forward. They were big and clunky, less elegant than a BoMar, but I felt they held up better to large doses of 215-220 power factor pin loads.
Image

Showing how the recoil spring plunger extends forward of the slide and telescopes into the comp, allowing the use of full-length springs for better function and spring life.
Image

LH side view. I wish I hadn’t engraved the side of the slide with such large letters. The I.V. magwell is overkill on a pin gun (if you’re reloading, meaning you didn’t go five pins in five shots, you’re already out of the money). But it does help with the lock-in, This one was sized for Felipe’s wife who is also quite a shooter. Blueing has gone a little light in some areas—I’m going to suggest he send it to Glenrock Blue for a re-do.
Image


Top
   
PostPosted: Mon Jul 14, 2014 7:32 pm 
Offline
Board Member
Board Member

Joined: Fri Feb 20, 2004 5:30 pm
Posts: 4422
Location: MI
The magwell on the chromed one—I made a disc of steel 2” diameter and ¼ thick and checkered it, then cut crescents off and silver-brazed them on. I had seen this done by other’smiths, and it worked, but I was not satisfied with it. The very next gun was the first one I made a one-piece magwell from scratch for and TIG’d it on.
Image

Felipe’s two magwells together.
Image


Top
   
PostPosted: Wed Jul 16, 2014 10:10 am 
Offline
Board Member
Board Member

Joined: Fri Feb 20, 2004 5:30 pm
Posts: 4422
Location: MI
Here is some more recent, but still pre-LTW, work. From 2002, so this one also has not been seen here before. A guy recently bought it and wanted something other than the Novak rear, and wanted a gold bead instead of tritium on the front. This is “the sight update job that caused a hangfire that lasted months”. I agreed to do the sight change since it was a piece of my work, but wow how sometimes a simple thing goes rabid on you!
Overall RHS:
Image

Gold bead front sight requested—sight and bead made from scratch by me. The bead is flat and not spherical for reasons I'll detail later.
Image

New rear sight – a provided 10-8. It overhung the back a bit and due to the notch relief. I could not just recut the rear face forward, so I re-serrated it on an arc to match the slide rear, minimizing the metal removed under the sight notch.
Image

The FLH Magwell…. A piece silver-brazed in place to facilitate the chamfering at the rear without creating a knife edge.
Image


Top
   
PostPosted: Wed Jul 16, 2014 10:53 am 
Offline
Members

Joined: Sat May 29, 2004 7:17 am
Posts: 173
Location: Back in the USAAAAA!!!!!
SHUSH!!! <....Its Ned, just leave him alone and let him play. He's not harmful to anyone but himself...Just DON'T look at the milling machine! Pretend you don't see it and back away......and show no fear!.....>


Top
   
PostPosted: Thu Jul 17, 2014 4:29 am 
Offline
Board Member
Board Member

Joined: Fri Feb 20, 2004 5:30 pm
Posts: 4422
Location: MI
Stopped short of harming myself actually but a few times I wanted to bang my head on the wall. The 10-8 sight was a little lower than the Novak, so I had to lower the front sight. I determined that once the existing sight insert was removed, I could lower it enough and still be able to use the old insert hole for a gold bead.

I decided to go "different" and use a white gold bead. Bought a $40 glob of white gold. As I worked it into the shape I needed, it started splitting-- it was very hard for being gold. O'course I don't know for sure what gets alloyed in to make it white. Tried to melt it back down into closer to the shape I needed and long story short it went to hell.

Bought another glob at a different place. Repeat the process almost exactly but got a piece I could work with. Pressed it into the sight and-- popped the top off the sight.

Bought a Wilson front sight as that is what the old one appeared to be. Loose in dovetail.

Bought two Dawsons because it sounded like they were gonna be the same thing but a little bigger. Too loose plus anyway the dovetail length side-to-side was short to the point of unsightly. I don't know what front sight I used on this thing 12 years ago but it was a little bigger than some others.

Took a block of 4130 and made a front sight. Took a gold lapel pin and hammered out an insert close enough to round to get it in the lathe and make what I needed.

Pressed and staked the gold bead in place.

Parkerized, Gun Koted and baked the sights.

Machined flat and polished the face of the gold bead, finishing with diamond paste. I made it flat because my exp. with anything radiused or spherical on the front sight is that lighting from the side will "move" the sight to one side or the other. This bead fairly glows in many lighting conditions. It glows to varying degrees but is always centered, it never has one side or the other in shadow.


Top
   
PostPosted: Fri Jul 18, 2014 9:51 pm 
Offline
Senior Member

Joined: Fri Feb 20, 2004 9:48 am
Posts: 888
Location: Prescott Valley, AZ
Awesome stuff Ned!

:shock:

8)

:mrgreen:

_________________
http://www.rogersprecision.com


Top
   
PostPosted: Sun Jul 20, 2014 3:08 am 
Offline
Members

Joined: Sat May 29, 2004 7:17 am
Posts: 173
Location: Back in the USAAAAA!!!!!
Ned, your problems with white gold may've been due to the nickel or other white metals alloyed with the yellow gold to make it appear white- or the rhodium plating if you used pre-plated white gold. Rhodium is used to give the white gold better wear properties and give it a more white appearance. I recall talking with a custom jeweler about a having a unit ring made. I didn't want yellow gold and asked for sterling silver, he steered me away from silver as wearing too easily and pushed me towards white gold.
The different beads on front sights- Call and McGivern came from competitive shooters for S&W back in the day- Charles Call and the legendary Ed McGivern. The Call front sight was flat and inset into the blade and the McGivern was a rounded bead attached to the sight blade face. Both completely different than the old Sheard bead sight which was an elongated bead perched on top used more for rifle sights but also on older S&Ws. I've got examples of each along with different King's front sights. I can say one of my favorites is a flat Call ivory bead on a sweet little 1st model K22. Something I didn't entirely expect coming from the normal black ramp/black post/trit/big dot/ etc 1911 world where we know SO much and are SO OBVIOUSLY smarter than all those uneducated, unrefined, limited knowledge, no shot timer, no chronograph, no electron, no plastic(sorry, 'advanced polymers') Neanderthal shooters who came before us.....I'm surprised those guys could get a round on paper!! :mrgreen:


Top
   
PostPosted: Sun Jul 20, 2014 5:35 am 
Offline
Board Member
Board Member

Joined: Fri Feb 20, 2004 5:30 pm
Posts: 4422
Location: MI
You forgot to mention Col. Charles Askins tying a white rag to the end of his Remington Model 11 shotgun for a night sight!

Yeah obviously there is not a whole lot of gold in white gold. The first batch, tested at the second shop, they told me "5% gold". I asked about what went into gold to make it white and how did that affect the harndess etc. but they couldn't tell me much-- most jewelry shops these days are not staffed by jewelers. We agreed though that white gold did not come from white gold mines.....

Both places steered me away from platinum as too soft.

When I tried to remelt the white gold it had a tremendously high melting temp which told me "not much gold". I made a little mold, just a piece of steel with a hole drilled in it (after melting the aluminum one). I had to resort to foundry temps and when it was all done I simply had a piece of steel that looked like a beginner had globbed silver solder all over it.... and nothing in the hole.


Top
   
Display posts from previous:  Sort by  
Post new topic  Reply to topic  [ 10 posts ] 

All times are UTC-08:00


Who is online

Users browsing this forum: Google [Bot] and 15 guests


You cannot post new topics in this forum
You cannot reply to topics in this forum
You cannot edit your posts in this forum
You cannot delete your posts in this forum
You cannot post attachments in this forum

Jump to:  
Powered by phpBB® Forum Software © phpBB Limited